This guide provides information for the replacement of a faulty 450A auger motor, replacing a broken auger or cleaning out a clogged up or jammed auger.
Time & Difficulty
15-20min
Medium Difficulty
Spare Parts (provided by Z Grills)
Auger motor or auger shaft
Cable ties
7/64″ allen key
Cable ties
Tools Required
Vacuum cleaner
Philips head screwdriver
Scissors or wire snips
Pliers or small socket set
7/64″ or 2.5mm Allen key
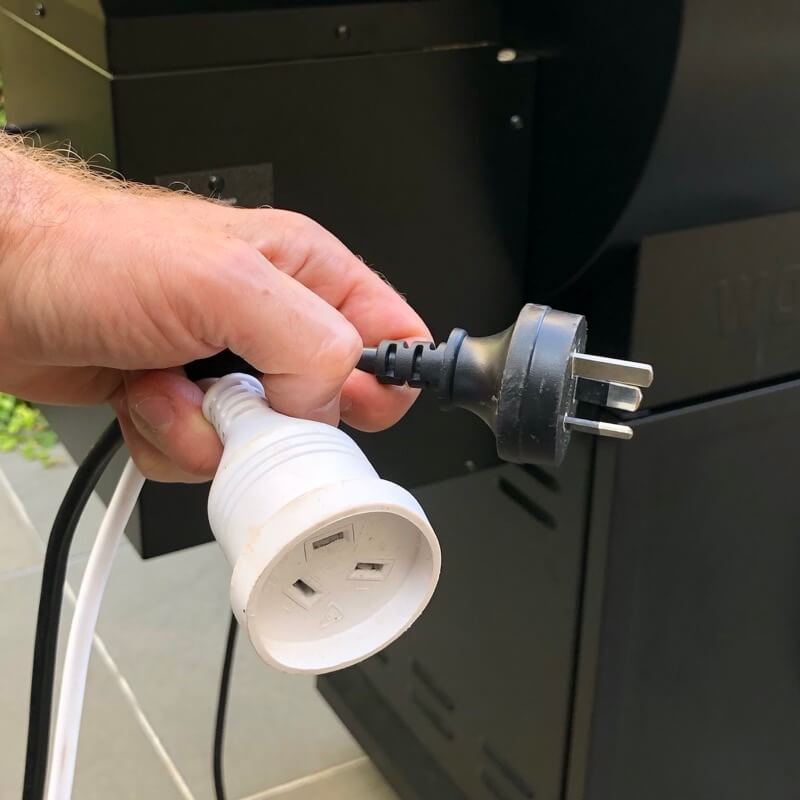
1. Unplug the power
Before doing any maintenance or cleaning, always unplug the power to the grill.
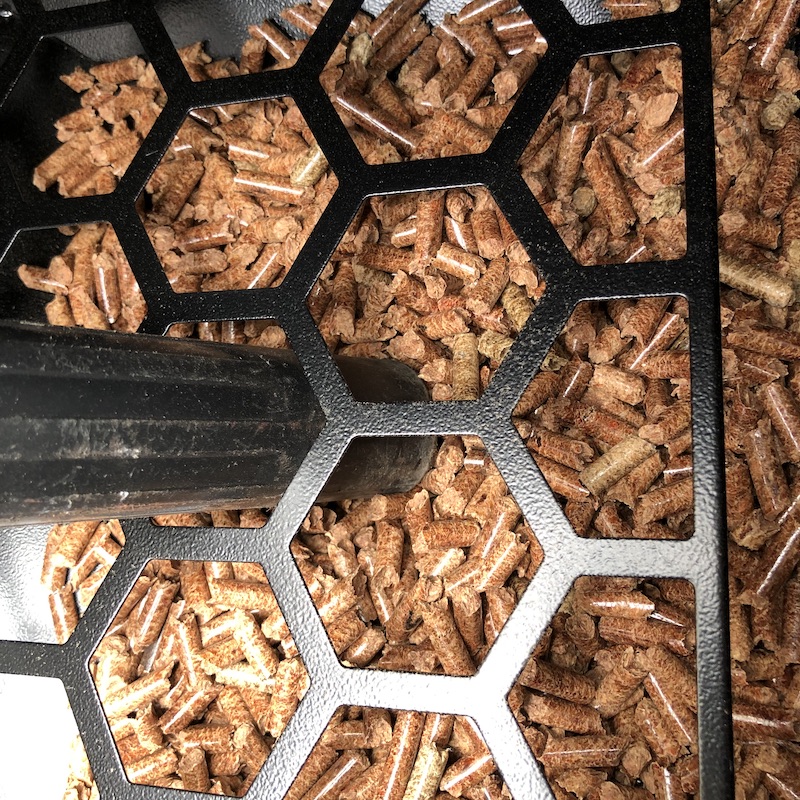
2. Empty the hopper
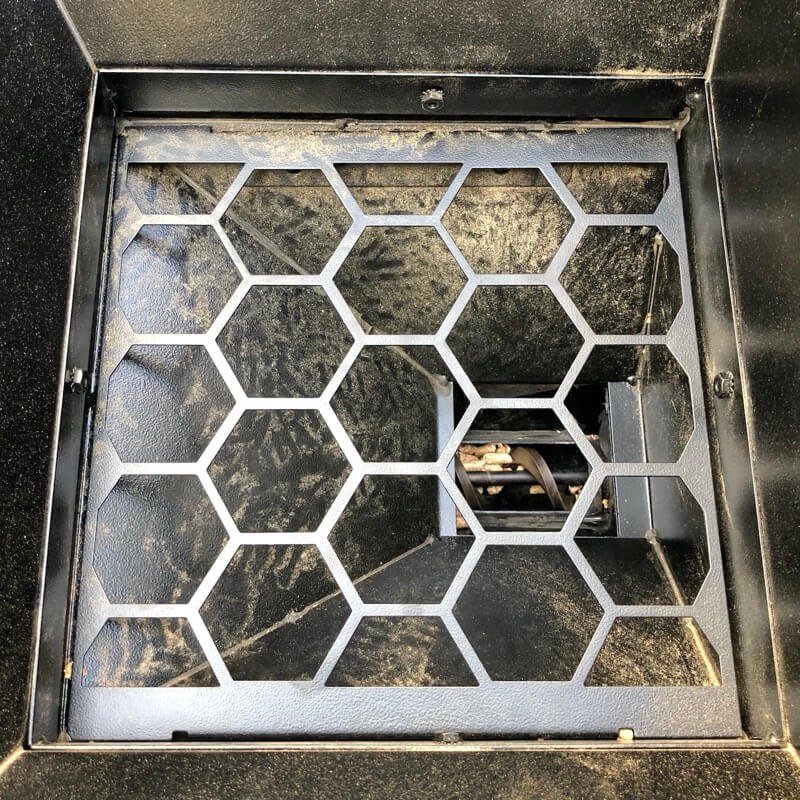
Scoop as many pellets out as you can using a plastic scoop or cup. Vacuum out the remaining pellets so you can see the Auger.
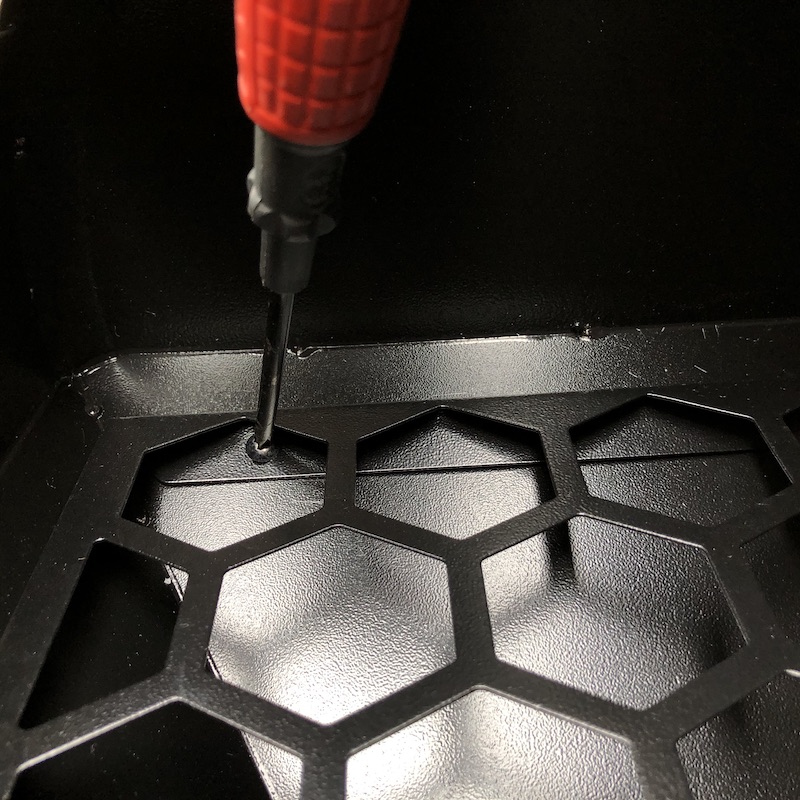
If your vacuum nozzle can’t fit through the hopper guard/grate you can remove it using a screwdriver.
The 2 screws are located just under the side of the guard.
Take care not to drop the screws down into the Auger.
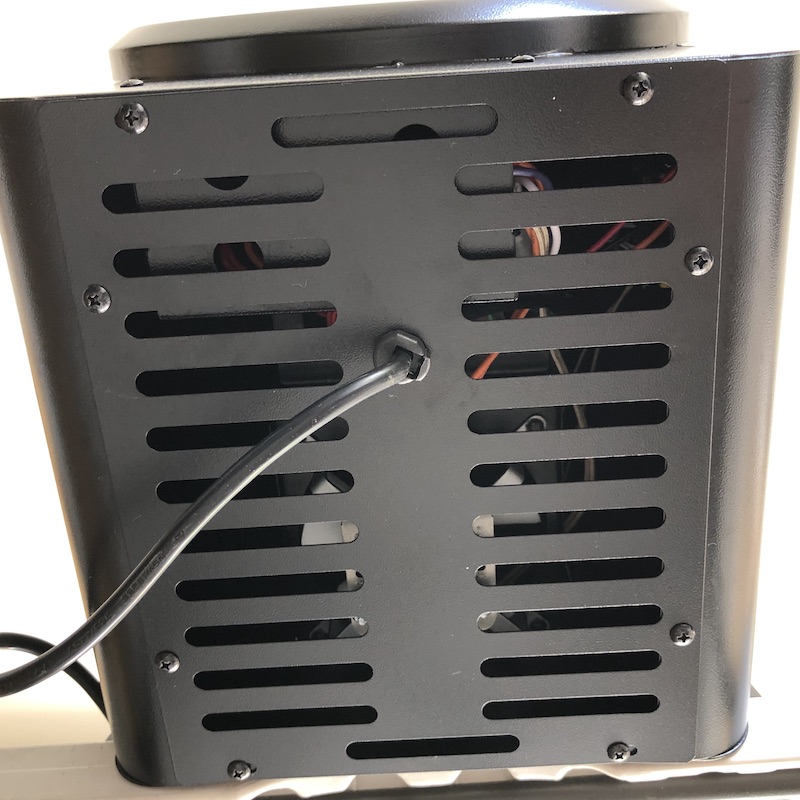
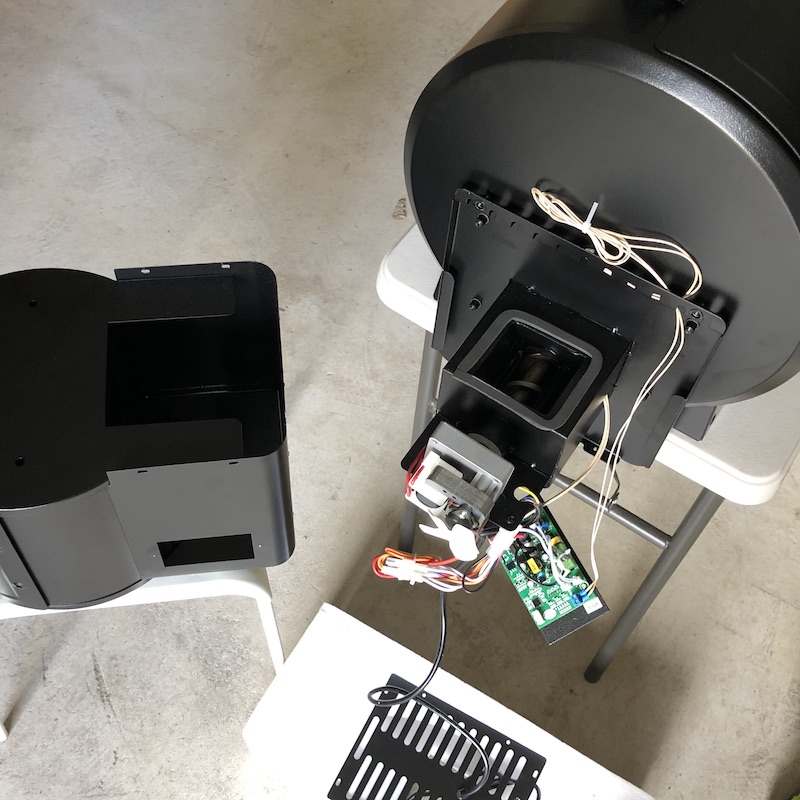
3. Remove base cover
Remove the 8 screws to release the base cover.
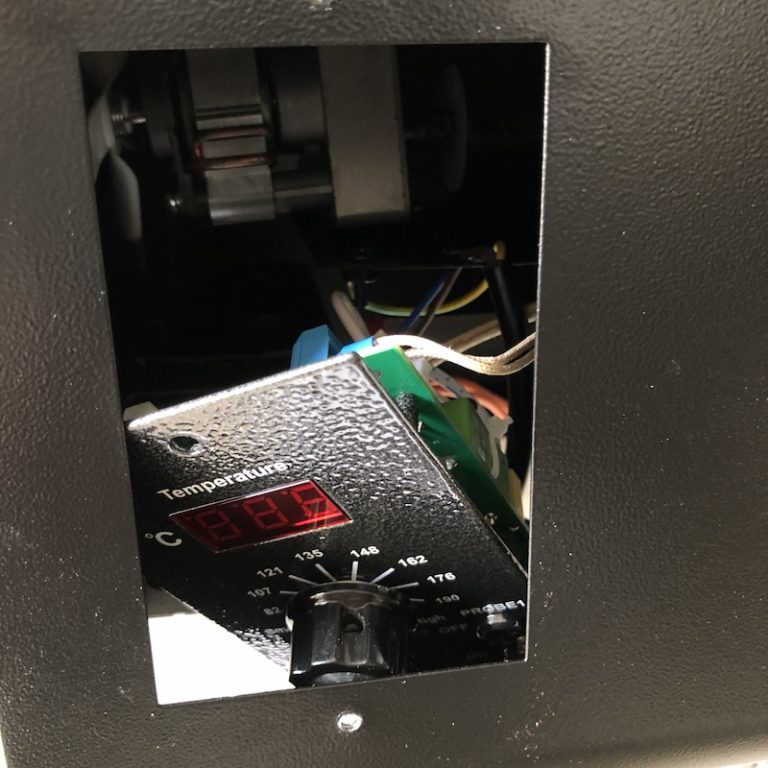
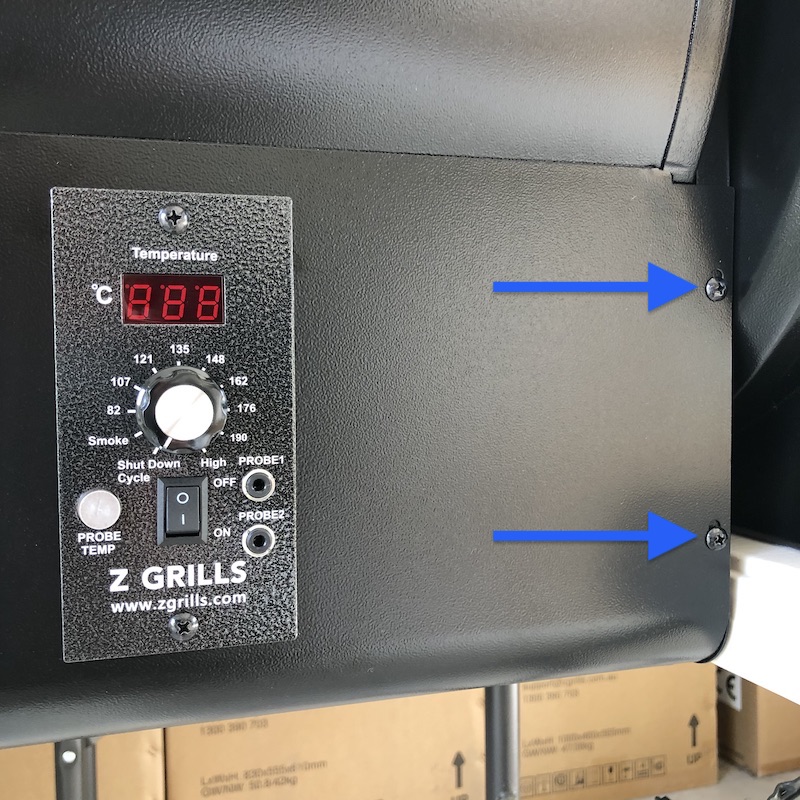
4. Release the controller
Remove the two screws in the front of the controller and push it through the front hole (hold on angle to fit through). Allow the controller to gently hang down.
Gently rotate the controller and pass it through the hole in the front so it is sitting inside the box.
If the controller is hard to move, it may be necessary to cut the white cable tie that is securing the cables together. Take care not to cut any of the wires.
Gently pull the bundle of wires sitting in the small box out.
5. Remove hopper box
Remove the 4 screws on the front/rear of the casing.
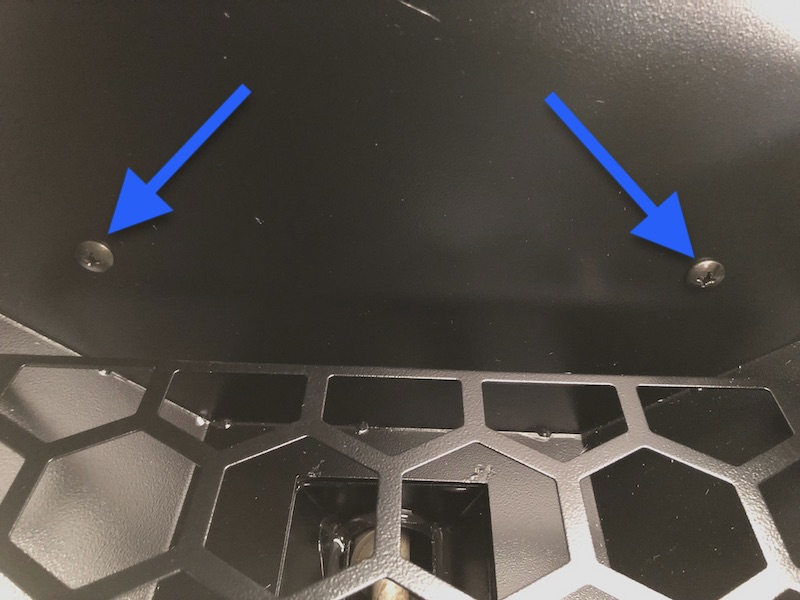
Remove the 2 screws inside the hopper.
Gently lift off the hopper and place off to the side out of the way.
You now have full access to the controller, auger and all the cables.
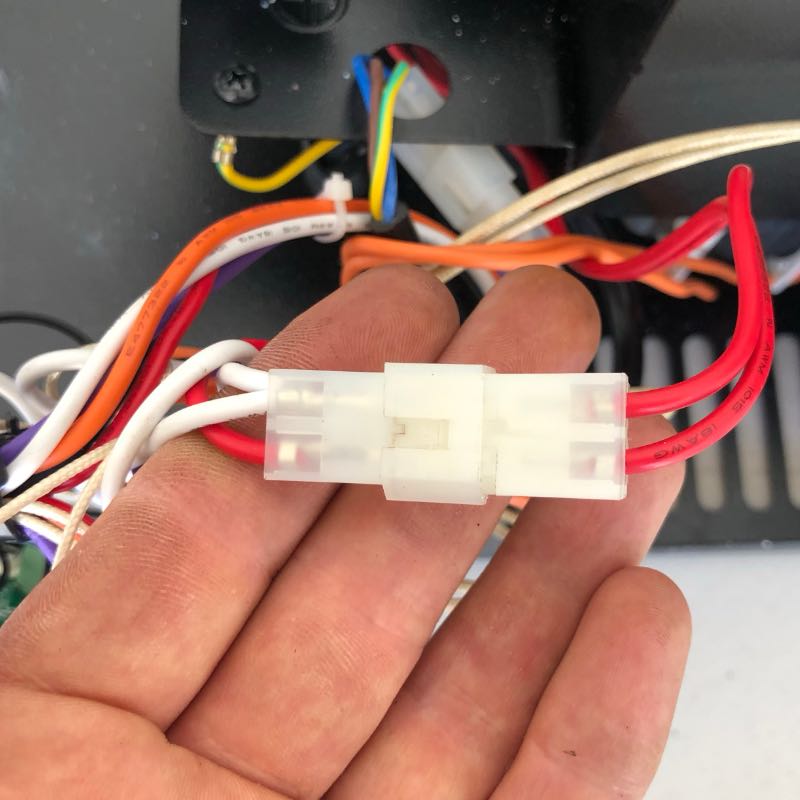
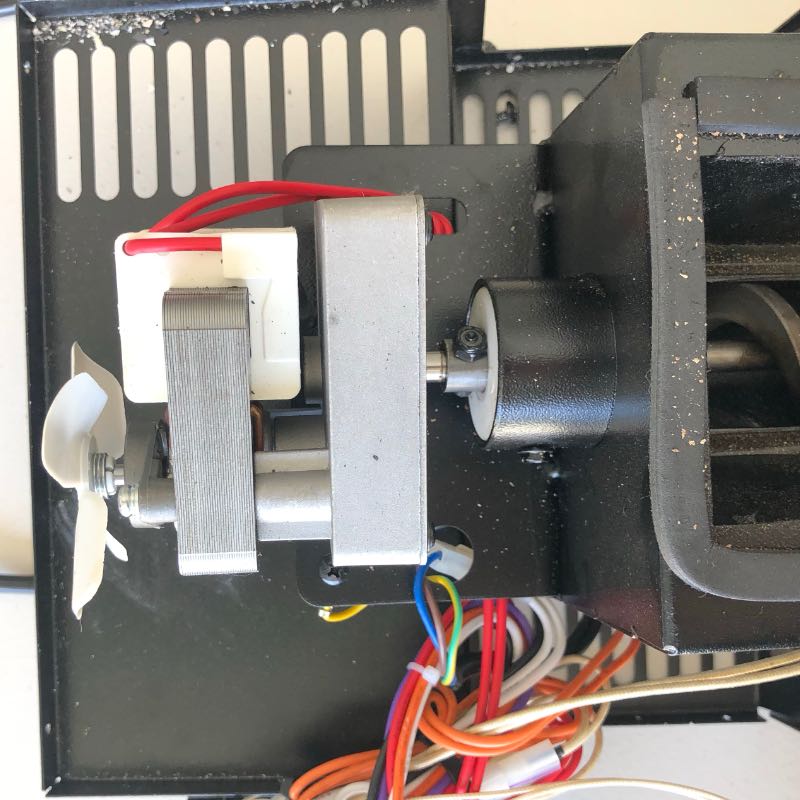
6. Unplug the auger motor
If replacing the Auger Motor, cut the plastic ties that are securing the cables together.
Unplug the Auger Motor (MOT) cable.
If just replacing or cleaning the auger, there is no need to unplug this cable.
Undo the red knot and pull the red cable and plug through the hole in the metal plate.
7. Check if auger is moving freely
Wobble the motor back and forth and rotate to ensure the Auger (long metal spiral) is moving freely. If it is moving freely, continue on to Step 8.
If the Auger is stuck in place then it may be jammed/clogged with moist pellets. This will also be clear as the pellets will not have easily vacuumed out.
To clear out the pellets remove the motor and drum screw as outlined in the next step then break apart the pellets with a screwdriver and work the auger slowly out. You may need to use a pair of pliers or small monkey wrench on the shaft to rotate it if very stuck.
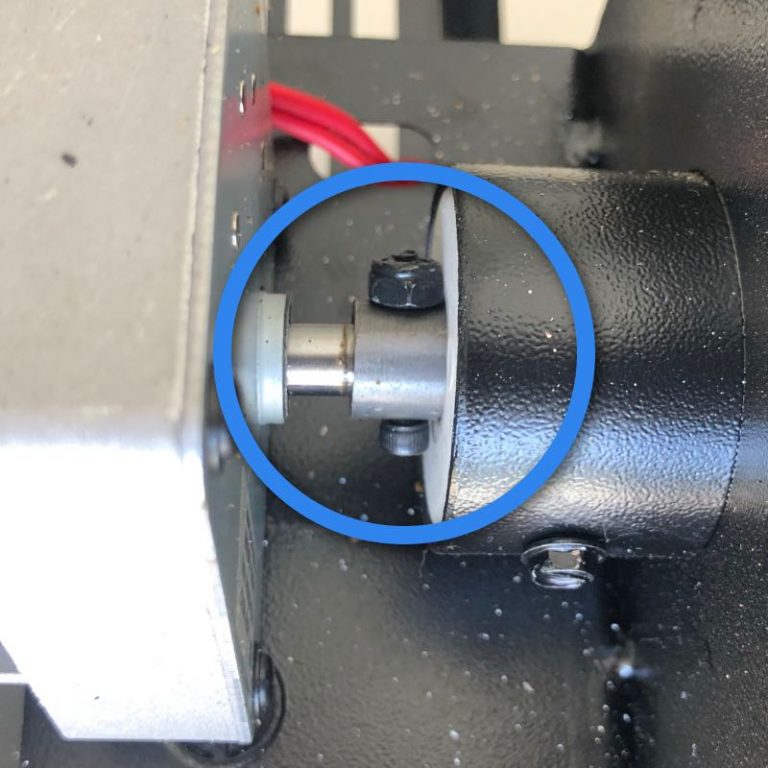
8. Remove auger shaft bolt
With a pair of pliers or socket and Allen key (7/64″ or 2.5mm) undo and remove the shaft bolt.
If you don’t have a suitable sized Allen key, using a pair of pliers on the Allen key head should also work.
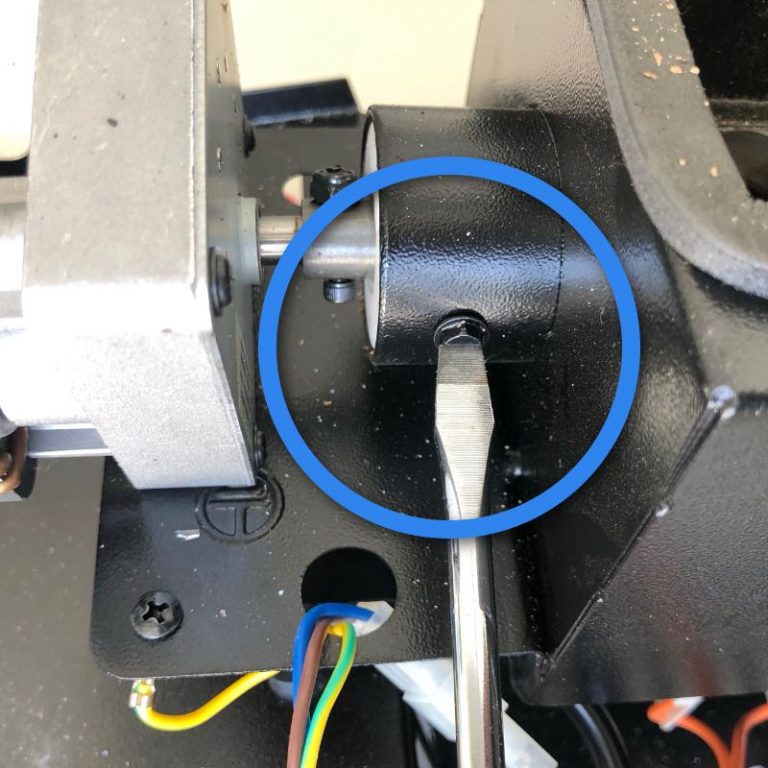
If the orientation of the shaft does not let you access the ends of the shaft bolt, or if wanting to pull out the auger, remove the screw on the side of the metal drum to allow the whole Auger to slide out (pliers may be easier than screwdriver)
Slide the Auger out enough to get a suitable orientation to remove the shaft bolt. You can safely slide the Auger right out if you want.
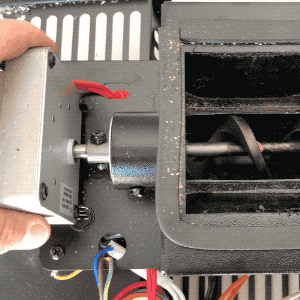
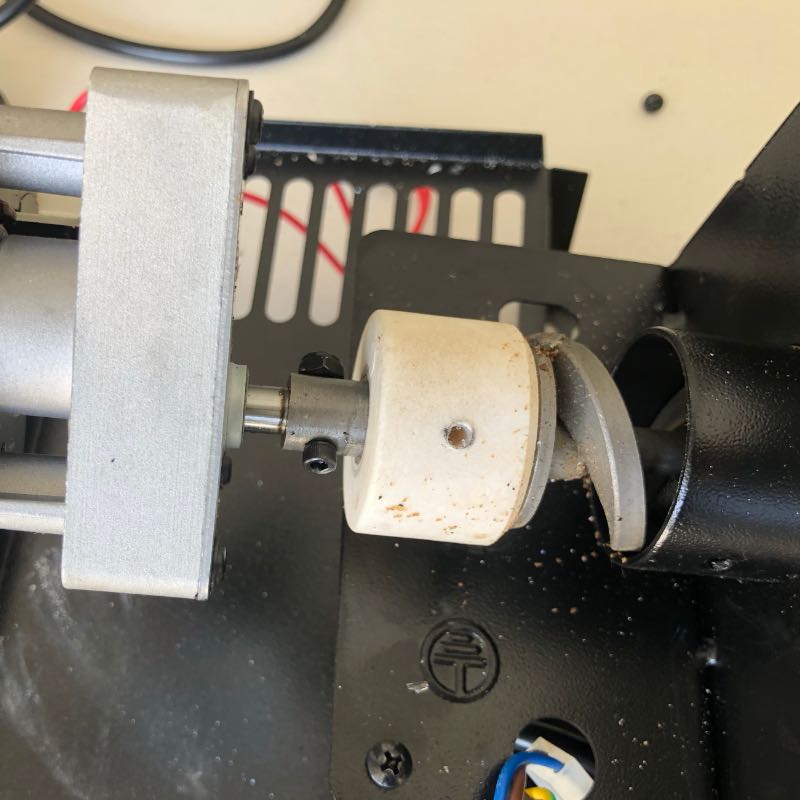
9. Remove and replace motor
Remove the motor and then reverse the process to attach the new one.
If you need to remove the auger and it is stuck, gently hit the end with a hammer and use pliers to wiggle and pull out.
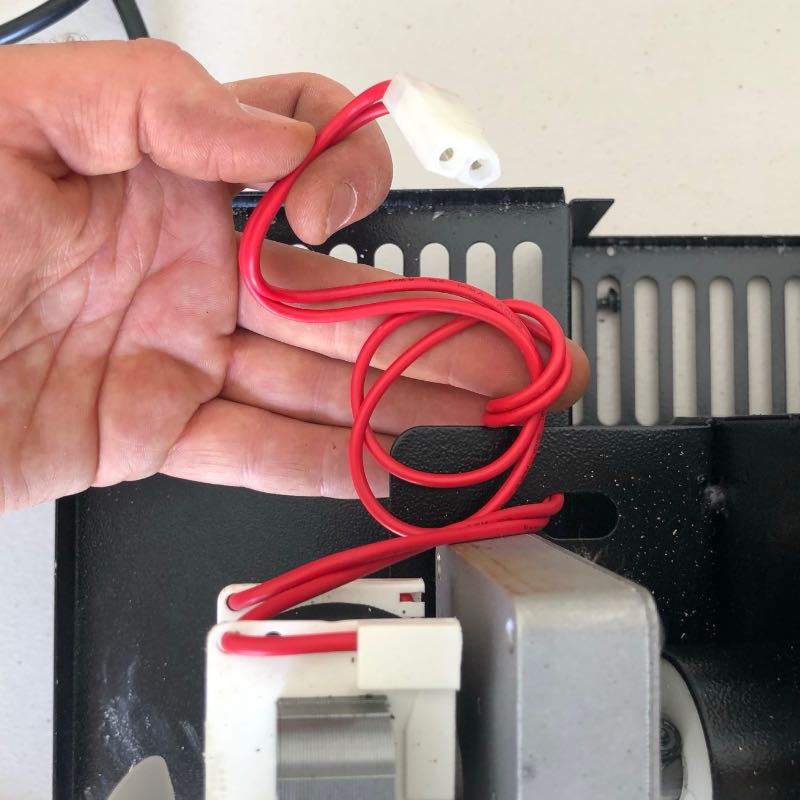
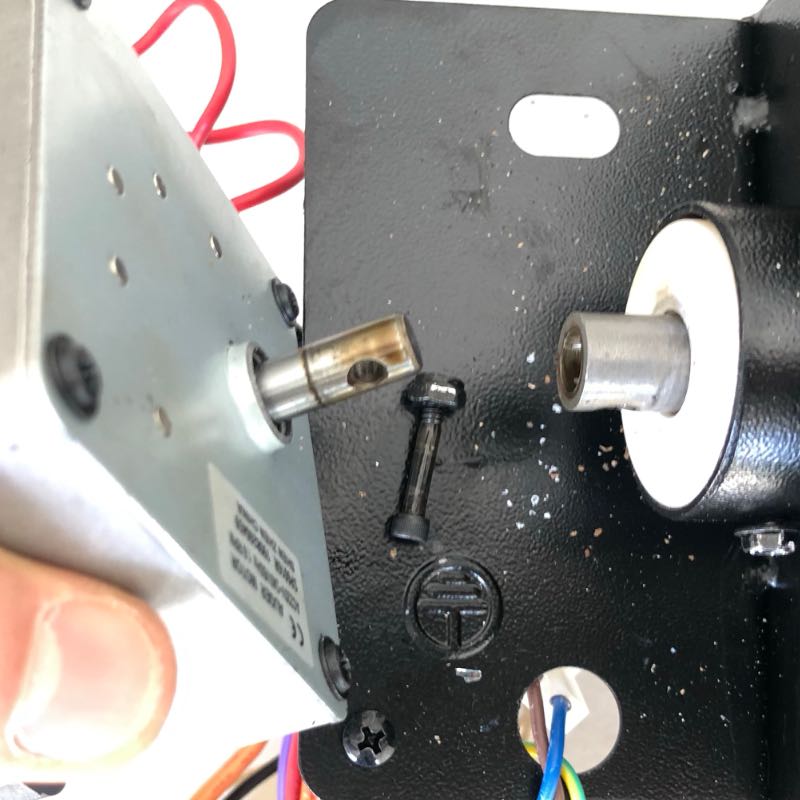
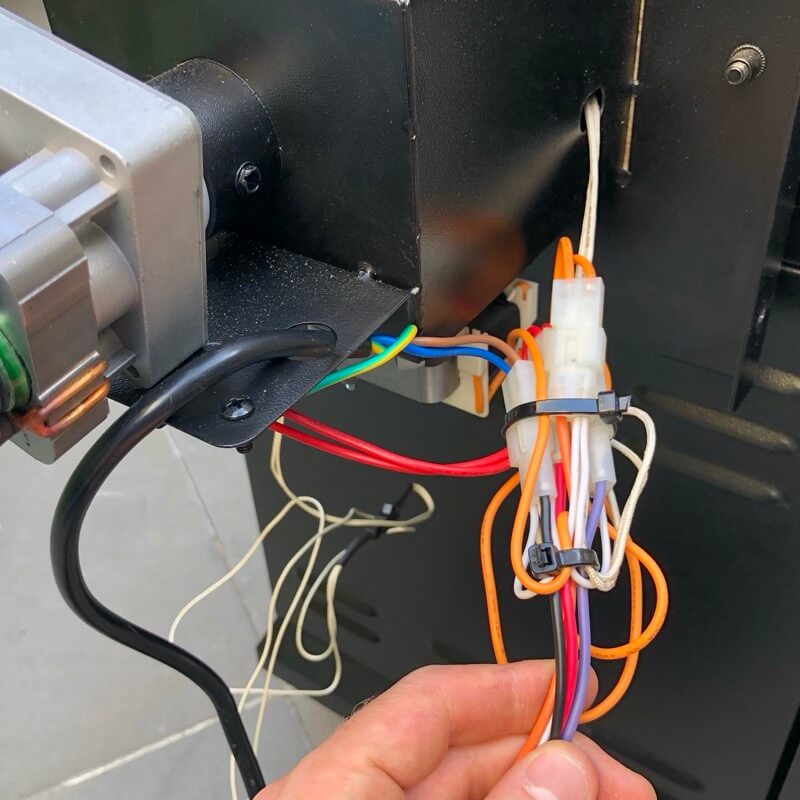
Run the cable back through the hole in the metal plate and tie a knot so the cable cannot put through.
Ensure there is enough slack in the cable so the motor can move freely.
Plug the cable back in.
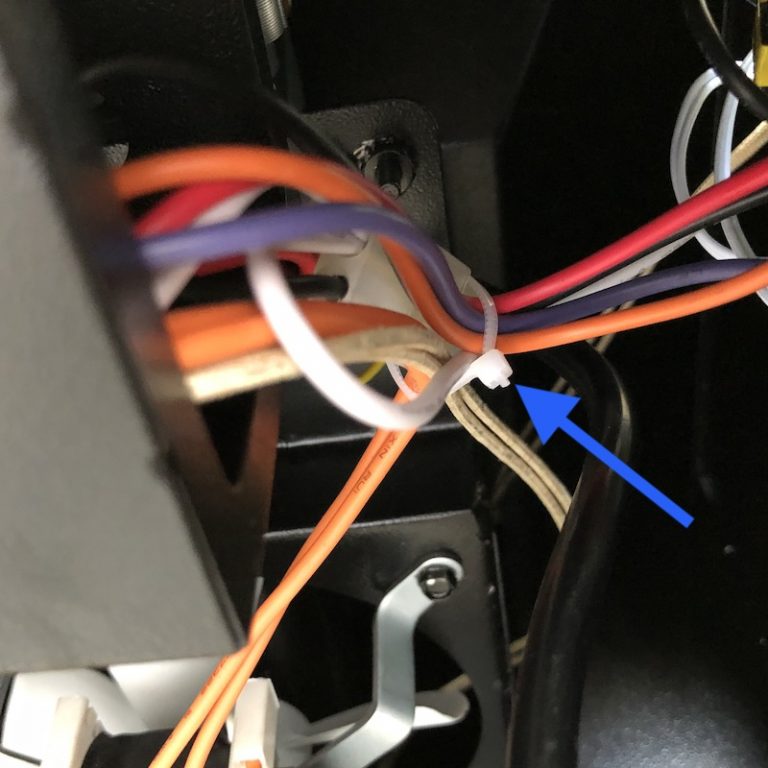
10. Clean up cables
Bundle the cables together close to the wall of the grill and secure them with cable ties. If they are hanging too far forward they can easily contact the auger fan once the controller is back in the normal position.
Ensure there is enough cable length to the controller so it can fit back into place.
11. Reverse the process
Reverse the above steps to assemble all parts back together.
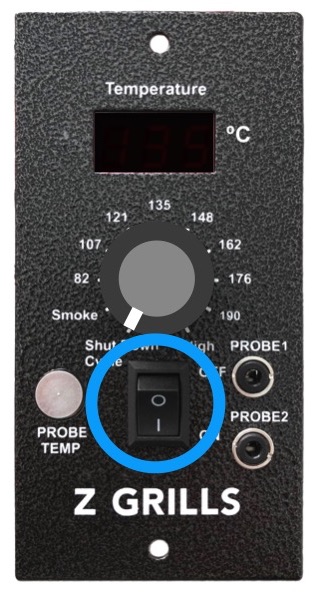
12. Test operation
Plug the power cable in and turn the controller power switch ON.
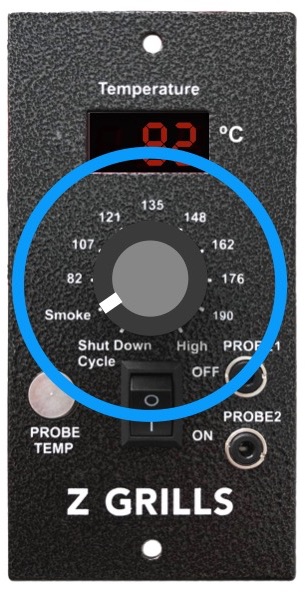
Turn the controller dial to Smoke.
Listen for any ticking noise that would indicate cables are contacting the auger fan. If this occurs, use your phone or mirror to look underneath to see if the cables are contacting the auger motor fan.
13. Check auger motor operation
If you turn to Smoke the auger will only run for a couple of seconds then stop for 20-30 seconds (normal operation). To more clearly see the auger rotating, turn the controller dial back and forth between Shut Down Cycle and Smoke to force the auger motor to run continually.
Look down inside the hopper to see if the auger is slow turning. If it is, congratulations, you are a Z Grills repair guru!
Turn the grill back to Shut Down Cycle and turn the power off. Unplug the grill from power supply.
Awesome work, you fixed it.
Back to cooking again!
Delivery FAQ
1. Why do the Click & Collect options cost money and have a transit time?
We partner with multiple freight companies to use their depots as a pickup points. This means in most cases, we’ll need to dispatch your order out from one of our three warehouses in Melbourne, Sydney or Brisbane. This option often costs significantly less than home deliveries especially for non-metro areas.
2. Where exactly is your Click & Collect location?
You will receive the exact pick up address once your order is ready for pick up. As part of our agreement with our partnering freight companies, we are not to share the exact pickup location prior to that.
3. Will the grill fit my car?
Our grills will fit in most hatchback vehicles and UTEs, however it may struggle to fit in a standard sedan. If you want to be sure, you can check out the dimensions of the boxes on our packing and freight page.
4. Why are some Click & Collect options cheaper?
The prices of the Click & Collect options vary from location to location. We do our best to get you the lowest freight price by comparing rates from multiple carriers.
5. When will I receive my order?
We usually dispatch your order the following business day after receiving it. It will then take roughly takes 1-3 days for metro orders and 3-7 days for regional orders.